Feeds:
Posts
Comments

Archive for the ‘Recipes’ Category

One of my dearest friends asked me to bake a cake for her 30th birthday party. We decided on chocolate since it’s always a crowd pleaser.

One of the chocolate cakes on my “to bake” list was Heston’s Exploding Chocolate cake. Get the recipe here

I ABSOLUTELY loved the idea of the cake, passion fruit and chocolate is a match made in heaven! It’s one of my favorite combinations, the tartness of the passion fruit cuts through the richness of the chocolate and gives it that extra ooomph of flavour and aroma which keeps you wanting one bite more! Also, I had the popping candy leftover from a previous recipe.

Exploding Chocolate Gateau

I am really glad I tested the cake recipe before the actual day, the cake was disappointing because it was just ok. I followed the instructions to a tee. The cake is fairly simple and straightforward to make if you omit spraying the surface with liquid chocolate (I was planning dust the surface with cocoa). The taste however was not what I was expecting! The passion fruit flavour and aroma was too weak that it just ended up tasting like a slightly tart chocolate ganache with a cheesecake base.

My husband said it was ok but could be improved on, he suggested changing the base and commented that the texture of the ganache was a like a thick ganache custard hybrid which is what you might expect in a chocolate tart but not what you expect in a chocolate cake, one would expect a lighter mousse / Bavarian cream texture.

Conclusions:
1. One of the reasons for this maybe that the amount of passion fruit pulp. I bought 6 individual large passion fruits from waitrose but I would probably describe the size as medium. The recipe calls for pulp of 6 passion fruits but failed to give the weight of pulp. Passion fruits can vary in size, variety and even the amount of pulp. I went through a passion fruit phase and made cakes, desserts, macarons, mousse, etc with passion fruits and realized that even though the size of the fruit looks identical, the amount of pulp contained in that fruit can really vary! When you pick it up, some are lighter and are half empty when you slice it open whereas others will be full of pulp. The weight of pulp for 6 fruits I used (incl. seeds) was about 120g.
2. The small amount of custard added to the recipe does dilute some of the flavour
3. The milk and dark chocolate mix is about right, sweetness is correct too.

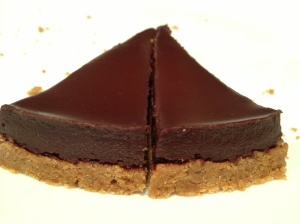
4. The recipe uses a 15cm cake ring, I only have a 20cm cake ring and was one of the reasons I tested the recipe, so I would know how much to increase the recipe by to suit my cake ring. The crumb base thickness was perfect for a 20cm cake ring (which means it would have been too thick for a 15cm diameter ring), but I would probably need to double the ganache recipe to get the desired height.

Thickness of crumb base and ganache using a 20cm diameter cake ring

I ended up making a different chocolate cake for my friends party. A 30th birthday of one of my dearest friends deserved a show stopper type cake and this wasn’t going to be it. I just wanted to share this experience so that if you decide to try the recipe, you might make your own adjustments to suit your taste preference.

I hope you don’t get the wrong idea, the recipe is by no means bad or weird tasting. It’s just not what one expects from something labelled a cake or gateau. I think this would make an ace chocolate passion fruit tart! Change the shortbread crumb base to a short crust or sweet shortcrust pastry and then fill with this ganache and it would be pretty darn awesome!

Read Full Post »

Here’s a recipe for another staple in a bakers cupboard, pistachio paste!

Summer is finally here in London! Ah glorious sunshine and strawberries are in season. My father in law is coming to London and I thought I’d bake him a fresh strawberry tart with a twist, pistachio flavoured creme patissiere!

To flavour my creme patissiere, I need to make my pistachio paste and here is my recipe.

Ingredients
400g pistachios, blanched and peeled
100g ground almond
200g caster sugar
65ml water

20120523-233715.jpg

Shelled pistachios

Method:
1. Bring a saucepan of water to a boil, tip in approx 450g pistachios and allow to boil for exactly 2 minutes. Tip pan contents into a colander and drain water

2. Use a tea towel and rub the blanched pistachios to remove the skins.

3. Weigh 400g of the peeled pistachios and place peeled pistachios into a large bowl.

Note: The pistachios are dry to touch but I don’t roast these to fully dry the pistachios as the moisture will help make this form a paste later. Pistachios do not contain as much fat as almonds and hazelnuts and therefore remain sand like when ground and do not clump into a paste so the moisture here will help include just the right amount of moisture.

20120523-234018.jpg

Peeled pistachios

4. Bring sugar and water to boil in a saucepan over medium heat. Stir only until sugar dissolves and bring it to a hard ball stage (118-120 C). Wash down the sides of the pan occasionally with a pastry brush dipped in water to prevent sugar from recrystallising.

5. When sugar has reached hard ball stage, tip onto peeled pistachios.

6. Add ground almonds, mix to combine and place mixture into food processor and pulse until it forms a paste

20120523-234743.jpg

Pistachio paste

Note: You can choose to add some green food colouring but I am happy with the colour. If I really need the colour to pop (e.g. macarons), I will add the necessary amount of colouring to that particular recipe instead of adding it to the pistachio paste.

Stay tuned for my strawberry tart with pistachio flavoured creme diplomat. I used the excess pate sucree (sweet shortcrust) and pistachio creme diplomat for mini tartlettes which are heading over to my hubby’s office.

20120525-162139.jpg

Strawberry and pistachio tartlettes

Read Full Post »

My mum sent me some bird’s nest recently and warned me over the phone, ” please don’t throw it away! The bird’s nest I sent you cost me RM600 (equivalent to over GBP100!)”. I’ve never made my birds nest soup before and decided to share a basic recipe from my mum!

Raw birds nest

Birds nest is a chinese delicacy and usually consumed as a soup. It sounds rather unappetising, as the part consumed is actually the saliva of a swiflet and is believed to have multiple health and beauty benefits. It has a jelly like texture and is extremely expensive! To help you get over the saliva bit, honey is produced when a bee regurgitates nectar (yup! bee puke) and is known to be good for health too!

In the olden days, birds nest used to be harvested from caves and workers risked their life and limb by climbing up without any safety equipment. Nowadays, it’s a highly controlled business (it’s like diamonds) and people actually build or rent shoplots and really go the distance to make it a comfortable bird hotel like playing specialised swiftlet calls and adding bird poop to encourage swiftlets into nesting there. I remember once when we were island hoping in Thailand, our tour guide told us NOT to go near a particular island with caves. He said that they harvest birds nest there and will shoot before asking as people have tried to come and poach nests before.

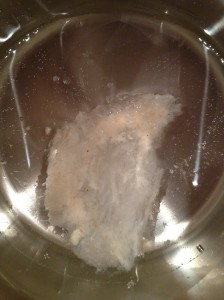
Step 2: Soak in water for 45 mins until translucent


Ingredients:

1 piece bird’s nest, cleaned

2 bowls (500ml) water

5 dried dates

rock sugar to taste


Methods:

  1. Soak birds nest for 45 mins or until translucent
  2. Soak dates
  3. Bring birds nest, water, dates to a boil and simmer on low heat for 15 mins. I then moved this into a thermal pot to continue cooking for another 45 mins.
  4. Add rock sugar to taste

Note: Be careful not to over cook as the birds nest disintegrates when over cooked.  You can also add other optional ingredients like goji berries, pandan leaves, lotus nut, egg.

Birds nest soup


Read Full Post »

I tried this dessert by Alexis Gauthier when we first dined at his then newly opened restaurant Gauthier in Soho. It tasted incredible (enough for me to come home and remember to google the recipe after an entire tasting menu and wine pairing). It seemed simple enough but the recipe required a fair bit of deciphering and interpretation.

Gauthier’s version of  the Louis XV dessert was inspired by his time at Alain Ducasse’s namesake dessert at his Le Louis XV restaurant in Monte Carlo.

See here for Gauthier’s recipe of Louis XV,

  1. The instructions are really brief and inaccurate (missed out ingredients in the method that is stated in the on the list).
  2. The ingredients are not listed to scale (some components of the recipe is listed for 3 batches?!)
  3. Some ingredients were difficult to identify (let alone procure online)
  4. I wanted to make some changes to the recipe in terms of appearance – it was entirely covered in chocolate ganache  and topped with gold leaf. I like to be able to see the different layers that make up a dessert and don’t particularly like gold leaf on my desserts.

Louis XV - appearance needs improvement

I made a few substitutions but will post the full amended recipe (and correct quantities) once I fine tune the recipe.

Notes:

  1. The flavour is excellent, but appearance has plenty to be improved on.
  2. Dacquoise (bottom layer) was too thick despite having halved the recipe. Recipe didn’t indicate how to bake this, or how thick it should be. Expands a fair bit in the oven when baked
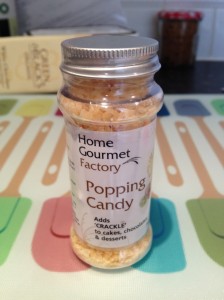
  3. Could not obtain feuillantine in small quantities (which give is a crunch), regular suggested substitutes were cornflakes and rice krispies but that’s a really inferior substitution so I substituted that with popping candy. That provided a bit of crunch and an added surprise but I need to be more careful to coat that in the praline and chocolate mixture.

    Popping candy

  4. Ganache paradis – went well with the overall taste but I might substitute this for a different ganache recipe next time.
  5. Original Louis XV dessert was topped with gold leaf, I don’t fancy gold leaf that much and will consider using patterned tempered chocolate, chocolate piping or maybe even white  and dark chocolate ganache patterns (something like the top of a mille feuille).

It’s back to the drawing board! 😦

Delicious despite its appearance

Read Full Post »

This dish is easy and soooo delicious and such a treat for the senses. It’s aromatic (from spices and fresh herbs), different textures and flavours from the tender lamb, al dente and slightly chewy giant couscous and the crunch from the pomegranate that also provides a bit of a tang. It’s one of those flavour alchemy type dishes – the taste is soooo much better together, more than the sum of its parts. I’ve adapted Heston’s slow cook recipe for real life by speeding up the cooking time for the lamb from 4 hours to 40 mins. This serves 4 as a main course.

This recipe is adapted from Heston Blumenthal at Home

Lamb shanks with giant couscous salad

Spice mix:

1/2 tsp ground ginger

1 tsp ground cinnamon

1 tsp ground coriander

Vinaigrette

50g olive oil

1 tsp ras-el-hanout (Moroccan ground spice mix)

20g sherry vinegar

5 g dijon mustard

1 tsp spice mix (above)

Lamb

2 lamb shanks

2 springs rosemary

700g lamb stock (original recipe calls for 1.5kg)

200g giant couscous

1 onion, finely diced

1 1/2 tsp spice mix (above)

1/2 tbsp ras-el-hanout

salt

olive oil

Garnish

5g parsley leaves, roughly chopped

1 sprig mint, roughly chopped

1 sprig basil leaves, roughly chopped

1 pomegranate, deseeded.

Method:

  1. For spice mix, mix the ground spices together thoroughly.
  2. For vinaigrette, gently heat 10g olive oil in a small saucepan with the ras-el-hanout for 3-4 mins. Remove from heat and whisk in remaining olive oil, sherry vinegar, mustard and 1 tsp of spice mix. Set aside
  3. For the lamb, Heston recommends cooking the lamb with 1kg of stock for 4 hours in the oven at 100C which takes wayyyy too much time. I cooked the lamb shanks in 500g stock and cooked in a pressure cooker for 40 mins. Allow to cool at room temperature. When cool, shred meat and set aside. NOTE: Do NOT be tempted to shred the meat when it is still hot, this dries out the meat and makes it stringy.
  4. Reduce stock to 200g over high heat or if you’re short for time like me, measure out 200g of the stock and cheat by adding a stock cube and use the remaining  stock (slightly less than 300g) to cook your couscous later. Remove from heat and put in the rosemary sprigs to infuse for 10 mins. Strain and discard rosemary.
  5. Add reduced stock to shredded lamb and sprinkle with ras el hanout and 1 tsp of spice mix.
  6. Saute onions with a bit of olive oil until tender (7-10 mins), sprinkle with 1/2 tsp spice mix and season with a bit of salt.
  7. Coat the bottom of saucepan with a thin layer olive oil, add giant couscous and saute over medium heat until the grains are golden (about 7-10 mins.) stirring constantly. Then add 500g lamb stock and bring to a boil. Cook for 6-7 minutes until al-dente then drain. Mix couscous with vinaigrette
  8. To serve, mix couscous, lamb, sauteed onions and most of pomegranate seeds and chopped herbs (save some for garnishing each plate). Season with salt and pepper to taste. Plate and sprinkle on remaining pomegranate seeds and herbs.

Ras-el-hanout is a Moroccan ground spice and is widely used in their cuisine, if you’ve been to Morocco you will instantly recognise the smell when you start using it. It’s wonderful with all sorts of meat and easily available in the middle eastern / world food / spices aisle in the supermarkets

Giant couscous / Israeli cous cous (ptitim) / Pearl couscous is nothing like regular couscous. It’s actually a type of pasta but has a nice chewy grain texture. This is a little harder to find but available in the kosher section of supermarkets.

Giant couscous

Hope you like it too! Let me know what you think?

Read Full Post »

Mogador macaron - Passion fruit and chocolate recipe by Pierre Herme

I know macarons have been all blogged out by now and even I am frankly tired of reading about macarons.

I first attempted baking macarons many years ago and there was only 1 recipe available online by Martha Stewart. Fast forward a few years, they are all over the web like a rash but my husband is coming home from his vacation today to a gloomy and rainy London,  thought I would bake him these little rays of sunshine to lessen the post holiday blues. Also, he bought me the Pierre Herme Macarons recipe book for no reason and one day came home with it!

I couldn’t decide which looked more cheery and sunshine like, so I made both the salted caramel and passion fruit and chocolate flavour. AT LAST, I have made macarons with intense flavour, not overly sweet and shop worthy. Not 100% as good as store bought Pierre Herme’s but incredibly close. The flavour is just sooo intense, aromatic and amazing! Both are really good but I have a slight preference for the mogador, the aroma of the passion fuit and the subtle tartness of the passion fruit just complements the chocolate.

Let me know if you want the recipe (not sure if anyone reads this so lazy to type out the whole recipe) plus it is also quite widely blogged about so no point me duping work.

Mogador

Notes:

  1. Pierre Herme recommends ageing your egg whites by separating egg white from yolks and leaving it in the fridge for up to 7 days. I didn’t follow this, bought straight from the store and it went straight into my mixing bowl and still turns out great.
  2. The flavours of the fillings are just amazing – use the best quality ingredients where possible but I substituted brands like tralbit coffee essence for another brand that I bought previously from an online specialist supplier but adjust quantities accordingly (I used less that he recommended). This book is worth buying just for the fillings which can be used to fill other desserts and cakes.
  3. I also substituted food colouring for the ones I already have and used less than he recommended. I add less than required and topped up at the end just before piping if the colour was too pale.

Read Full Post »

Quite a few recipes on my “to-do list” require praline or praline paste. Praline paste is quite easily available online in the UK but are either expensive when sold in small quantities or available in industrial size quantities so I’ve decided to make a batch from scratch.

Roasted hazelnuts

The term praline is loosely used to describe a wide range of things and even the definition in Larousse Gastronomique references multiple uses. Here is the definition according to Larousse Gastronomique:

Praline is traditionally a confection consisting of almonds coated with caramelised sugar. The granulated appearance results from the technique used in its manufacture: the almonds are heated in sugar syrup to the hard crack stage so that crystals form around the nut. The almond is coated several times with sugar syrup, the last coating being coloured and flavoured.

In modern culinary use, the term refers to almonds coated with caramel, or cooked with sugar until caramelised and set in a thin layer on a baking sheet It is used in patisserie and confectionery, for flavouring creams and ice creams, and for filling sweets and chocolates.

Praliné is a delicate filling for sweets (candies) or chocolates, consisting of lightly roasted almonds or hazelnuts mixed with sugar, then crushed with cocoa or cocoa butter.

I’m after its modern culinary use which is highlighted in red and am going a step further and making it into a paste.

Recipe:

100g peeled hazelnut, roasted

50g blanched almonds, roasted

150g caster sugar

60g water

Method:

  1. Skin and toast hazelnuts and almonds. See my tip on how to peel hazelnuts
  2. Prepare a large baking tray and line with baking paper.
  3. Put sugar and water into a saucepan over medium heat. Stir only until sugar dissolves, STOP STIRRING and bring to a boil.

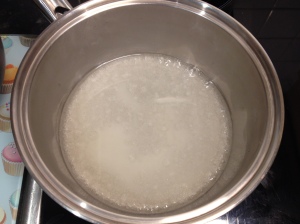
    Ensure all sugar is dissolved - I actually swirl the pan to dissolve the sugar rather than stir as you have less to wash up after but do whatever floats your boat.

  4. Wash down the sides of the pan occasionally with a pastry brush dipped in water to prevent any crystals from forming.
  5. Watch sugar like a hawk when it begins to colour, for praline it should be a deep golden brown (similar to the colour of regular honey). It’s important to get the right amount of caramelisation. Too early, the pale mixture will not have the desired flavour and too late, the dark mixture will impart a burnt smell.

    Sugar begins to colour and caramelise at 160C. I don't usually use a thermometer for this but have included it here for your reference. Sugar is at 166C in this pic.

  6. Just before desired colour is achieved, tip the nuts into the pan and quickly swirl them around to coat with caramel and pour caramel nut mixture onto the baking paper lined baking tray. Work quickly, addition of nuts to caramel will reduce the temperature and sugar will start to set.

    Praline

  7. Leave to cool and set completely
  8. Break into large chunks and finely crush until it reaches a paste using a food processor or pestle and mortar.

    Crushed praline - stop here if you want this still with a bit of crunch.

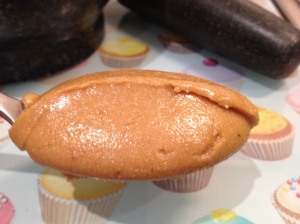
    Praline paste

Notes:

  • See my earlier tip on how to easily skin and toast hazelnuts
  • Maintain the 1:1 nut to sugar ratio but feel free to change the hazelnut to almond ratio. E.g. use 75g hazelnuts and 75g almonds. I prefer a slightly stronger hazelnut flavour so kept a higher hazelnut to almond ratio.
  • I used a food processor to blend it to a fine powder (when the mixture collects on the sides of the food processor) and then used the pestle and mortar to get the silky smooth texture.
  • The texture is smooth but the professional brand praline paste I used previously had a denser texture although that maybe due to the separation of  the oil from the mixture.
  • Store in an airtight container in the fridge
  • P/S: Make a larger quantity than you require for your recipe, it smells so good that I kept eating it on its own.
  • If I have any leftovers, I will experiment with adding cocoa or dark chocolate and post the results.

Read Full Post »

Many recipes involve using hazelnuts and begin by having to remove the skin/ peel. I tried using the traditional method of roasting and patiently using a dish towel to remove the skins but soon lost patience and learnt to totally avoid recipes that require peeled hazelnuts if I was not able to locate pre-peeled hazelnuts in the supermarket.

*drum roll* until I discovered this easy peasy method by Alice Medrich which was popularised by Julia Child. It is much easier but messy and fiddly nevertheless!

Recipe:

500ml boiling water

2 tbsp baking soda

Any amount of hazelnuts that you can immerse in that liquid (I used 550g whole hazelnuts)

Method:

  1. Bring water to boil in a saucepan large saucepan (water will foam up and bubble over if you use a small saucepan).

    Step 2: Add baking soda to boiling water

  2. Add 2 tbsp baking soda – will foam up at this point
  3. Immediately add hazelnuts into the water and boil for 3 minutes – water will go reddish and foam up again

    Step 3: Reddish foam when hazelnuts are added into saucepan

  4. Prep a small bowl and fill with cold tap water
  5. After 3 minutes, remove one hazelnut from the mixture and drop into cold water. Use your fingers to check if the skin of the hazelnut can be easily removed when you rub the hazelnut skin. If it doesn’t detach easily, return to the pan continue boiling for an additional minute and repeat test on a different sample.
  6. When done, pour the entire pan contents (hazelnuts and black coloured water) into a colander and run under cold water.

    Step 6: Tip contents into a colander and run under cold water to "shock" cool hazelnuts

  7. Rub a bunch of hazelnuts between your hands (like when one rubs hands together in glee / warm up cold hands in winter) or use a disposable tea towel to remove hazelnut skin / peel. I also then dunked the remaining half peeled ones into a bowl of water to remove the remaining scraps of peel to minimise the mess.

    Step 7: How it looks like once it was blanched in baking soda solution

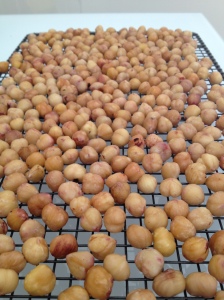
  8. Then place on a kitchen towel lined tray / cooling rack to dry.
  9. If desired, toast in the oven for 15 minutes at 180 C.

    Step 9: Roasted hazelnuts

    I started out with 550g of hazelnuts (according to the packaging) and ended up with 500g of roasted peeled hazelnuts ( but some hazelnuts were consumed in the name of tasting).

    Hope this was helpful! Stay tuned for the next tip on how to make praline.

Read Full Post »