Feeds:
Posts
Comments

Archive for the ‘Baking tips’ Category

Here’s a recipe for another staple in a bakers cupboard, pistachio paste!

Summer is finally here in London! Ah glorious sunshine and strawberries are in season. My father in law is coming to London and I thought I’d bake him a fresh strawberry tart with a twist, pistachio flavoured creme patissiere!

To flavour my creme patissiere, I need to make my pistachio paste and here is my recipe.

Ingredients
400g pistachios, blanched and peeled
100g ground almond
200g caster sugar
65ml water

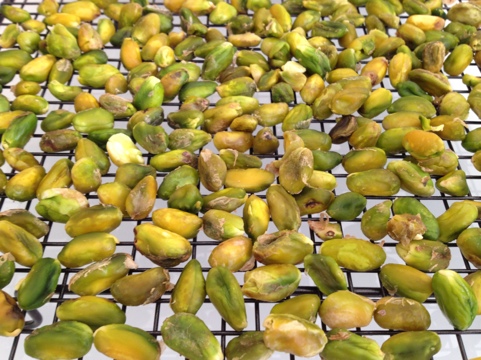
20120523-233715.jpg

Shelled pistachios

Method:
1. Bring a saucepan of water to a boil, tip in approx 450g pistachios and allow to boil for exactly 2 minutes. Tip pan contents into a colander and drain water

2. Use a tea towel and rub the blanched pistachios to remove the skins.

3. Weigh 400g of the peeled pistachios and place peeled pistachios into a large bowl.

Note: The pistachios are dry to touch but I don’t roast these to fully dry the pistachios as the moisture will help make this form a paste later. Pistachios do not contain as much fat as almonds and hazelnuts and therefore remain sand like when ground and do not clump into a paste so the moisture here will help include just the right amount of moisture.

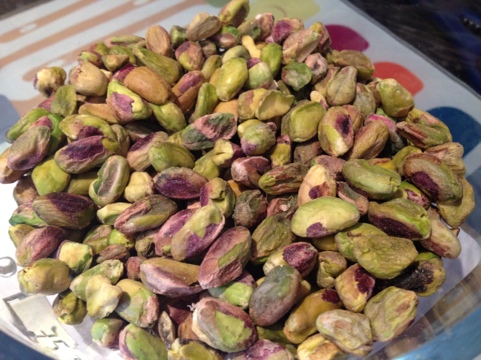
20120523-234018.jpg

Peeled pistachios

4. Bring sugar and water to boil in a saucepan over medium heat. Stir only until sugar dissolves and bring it to a hard ball stage (118-120 C). Wash down the sides of the pan occasionally with a pastry brush dipped in water to prevent sugar from recrystallising.

5. When sugar has reached hard ball stage, tip onto peeled pistachios.

6. Add ground almonds, mix to combine and place mixture into food processor and pulse until it forms a paste

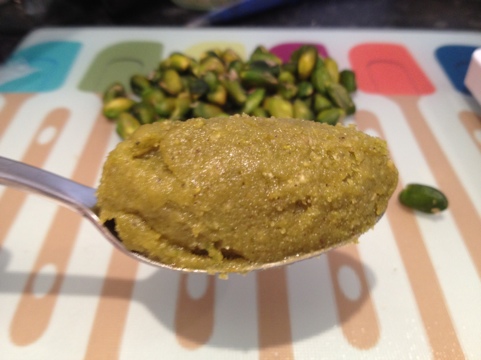
20120523-234743.jpg

Pistachio paste

Note: You can choose to add some green food colouring but I am happy with the colour. If I really need the colour to pop (e.g. macarons), I will add the necessary amount of colouring to that particular recipe instead of adding it to the pistachio paste.

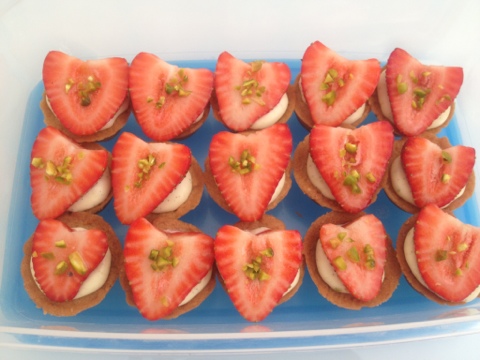
Stay tuned for my strawberry tart with pistachio flavoured creme diplomat. I used the excess pate sucree (sweet shortcrust) and pistachio creme diplomat for mini tartlettes which are heading over to my hubby’s office.
20120525-162139.jpg

Strawberry and pistachio tartlettes

Read Full Post »

Quite a few recipes on my “to-do list” require praline or praline paste. Praline paste is quite easily available online in the UK but are either expensive when sold in small quantities or available in industrial size quantities so I’ve decided to make a batch from scratch.

Roasted hazelnuts

The term praline is loosely used to describe a wide range of things and even the definition in Larousse Gastronomique references multiple uses. Here is the definition according to Larousse Gastronomique:

Praline is traditionally a confection consisting of almonds coated with caramelised sugar. The granulated appearance results from the technique used in its manufacture: the almonds are heated in sugar syrup to the hard crack stage so that crystals form around the nut. The almond is coated several times with sugar syrup, the last coating being coloured and flavoured.

In modern culinary use, the term refers to almonds coated with caramel, or cooked with sugar until caramelised and set in a thin layer on a baking sheet It is used in patisserie and confectionery, for flavouring creams and ice creams, and for filling sweets and chocolates.

Praliné is a delicate filling for sweets (candies) or chocolates, consisting of lightly roasted almonds or hazelnuts mixed with sugar, then crushed with cocoa or cocoa butter.

I’m after its modern culinary use which is highlighted in red and am going a step further and making it into a paste.

Recipe:

100g peeled hazelnut, roasted

50g blanched almonds, roasted

150g caster sugar

60g water

Method:

  1. Skin and toast hazelnuts and almonds. See my tip on how to peel hazelnuts
  2. Prepare a large baking tray and line with baking paper.
  3. Put sugar and water into a saucepan over medium heat. Stir only until sugar dissolves, STOP STIRRING and bring to a boil.

    Ensure all sugar is dissolved - I actually swirl the pan to dissolve the sugar rather than stir as you have less to wash up after but do whatever floats your boat.

  4. Wash down the sides of the pan occasionally with a pastry brush dipped in water to prevent any crystals from forming.
  5. Watch sugar like a hawk when it begins to colour, for praline it should be a deep golden brown (similar to the colour of regular honey). It’s important to get the right amount of caramelisation. Too early, the pale mixture will not have the desired flavour and too late, the dark mixture will impart a burnt smell.

    Sugar begins to colour and caramelise at 160C. I don't usually use a thermometer for this but have included it here for your reference. Sugar is at 166C in this pic.

  6. Just before desired colour is achieved, tip the nuts into the pan and quickly swirl them around to coat with caramel and pour caramel nut mixture onto the baking paper lined baking tray. Work quickly, addition of nuts to caramel will reduce the temperature and sugar will start to set.

    Praline

  7. Leave to cool and set completely
  8. Break into large chunks and finely crush until it reaches a paste using a food processor or pestle and mortar.

    Crushed praline - stop here if you want this still with a bit of crunch.

    Praline paste

Notes:

  • See my earlier tip on how to easily skin and toast hazelnuts
  • Maintain the 1:1 nut to sugar ratio but feel free to change the hazelnut to almond ratio. E.g. use 75g hazelnuts and 75g almonds. I prefer a slightly stronger hazelnut flavour so kept a higher hazelnut to almond ratio.
  • I used a food processor to blend it to a fine powder (when the mixture collects on the sides of the food processor) and then used the pestle and mortar to get the silky smooth texture.
  • The texture is smooth but the professional brand praline paste I used previously had a denser texture although that maybe due to the separation of  the oil from the mixture.
  • Store in an airtight container in the fridge
  • P/S: Make a larger quantity than you require for your recipe, it smells so good that I kept eating it on its own.
  • If I have any leftovers, I will experiment with adding cocoa or dark chocolate and post the results.

Read Full Post »

Many recipes involve using hazelnuts and begin by having to remove the skin/ peel. I tried using the traditional method of roasting and patiently using a dish towel to remove the skins but soon lost patience and learnt to totally avoid recipes that require peeled hazelnuts if I was not able to locate pre-peeled hazelnuts in the supermarket.

*drum roll* until I discovered this easy peasy method by Alice Medrich which was popularised by Julia Child. It is much easier but messy and fiddly nevertheless!

Recipe:

500ml boiling water

2 tbsp baking soda

Any amount of hazelnuts that you can immerse in that liquid (I used 550g whole hazelnuts)

Method:

  1. Bring water to boil in a saucepan large saucepan (water will foam up and bubble over if you use a small saucepan).

    Step 2: Add baking soda to boiling water

  2. Add 2 tbsp baking soda – will foam up at this point
  3. Immediately add hazelnuts into the water and boil for 3 minutes – water will go reddish and foam up again

    Step 3: Reddish foam when hazelnuts are added into saucepan

  4. Prep a small bowl and fill with cold tap water
  5. After 3 minutes, remove one hazelnut from the mixture and drop into cold water. Use your fingers to check if the skin of the hazelnut can be easily removed when you rub the hazelnut skin. If it doesn’t detach easily, return to the pan continue boiling for an additional minute and repeat test on a different sample.
  6. When done, pour the entire pan contents (hazelnuts and black coloured water) into a colander and run under cold water.

    Step 6: Tip contents into a colander and run under cold water to "shock" cool hazelnuts

  7. Rub a bunch of hazelnuts between your hands (like when one rubs hands together in glee / warm up cold hands in winter) or use a disposable tea towel to remove hazelnut skin / peel. I also then dunked the remaining half peeled ones into a bowl of water to remove the remaining scraps of peel to minimise the mess.

    Step 7: How it looks like once it was blanched in baking soda solution

  8. Then place on a kitchen towel lined tray / cooling rack to dry.
  9. If desired, toast in the oven for 15 minutes at 180 C.

    Step 9: Roasted hazelnuts

    I started out with 550g of hazelnuts (according to the packaging) and ended up with 500g of roasted peeled hazelnuts ( but some hazelnuts were consumed in the name of tasting).

    Hope this was helpful! Stay tuned for the next tip on how to make praline.

Read Full Post »